

If you’re striving for that flawless, bowling-green finish, you might spend hours worrying about the right fertiliser, the perfect mowing height, or the best time to aerate. These are all crucial, yes, but often, the real secret to a healthy, vibrant lawn isn’t on the surface—it’s deep down in the soil.
Think of your soil as the foundation of your lawn’s home. No matter how much you decorate (fertilise) or clean (mow), if the foundation is unstable, the house won't thrive. And the single most important metric for understanding your soil’s stability is its pH level.
Soil pH dictates the availability of essential nutrients. Get it wrong, and your grass struggles to eat, even if you’re spoon-feeding it the best nutrients money can buy! Sound complicated? Don't worry. As your resident lawn expert, I’m going to simplify the science and show you exactly how to test soil ph, what the results mean, and the simple, affordable lawn soil amendments you can use to correct any imbalance. Get ready to gain the ultimate power over your grass’s health!
The pH Scale Simplified: Why Does It Matter So Much?
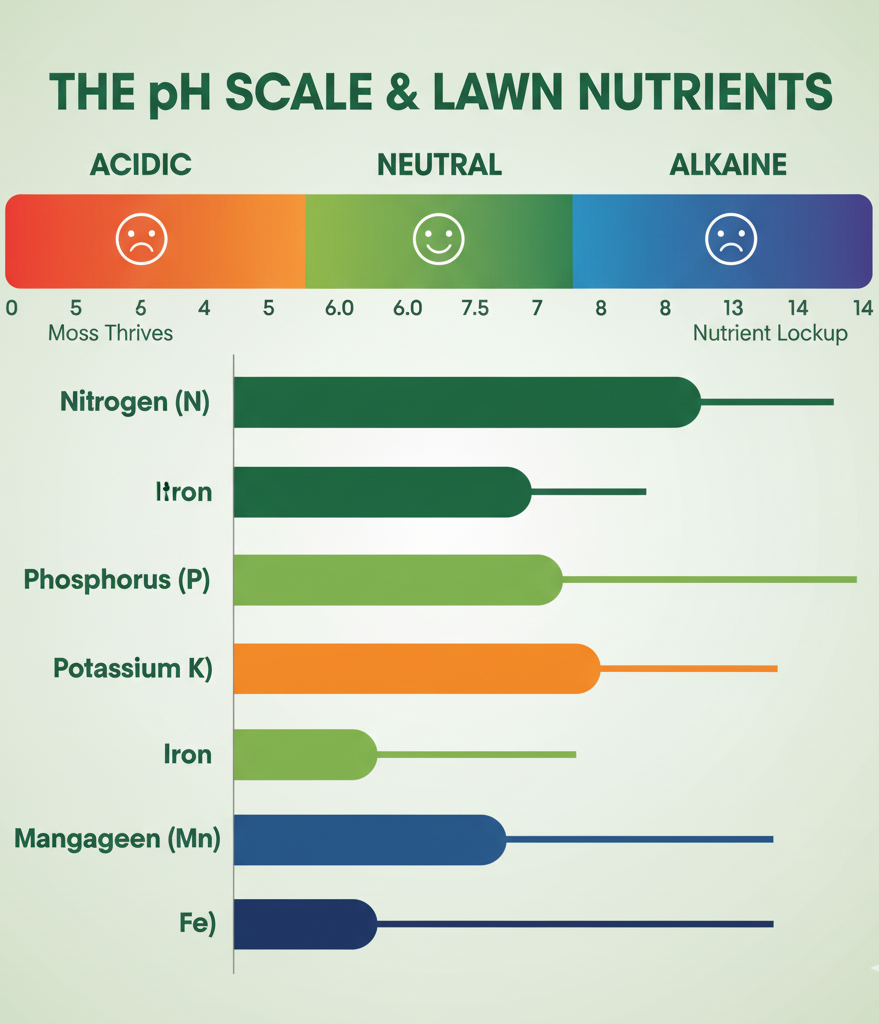
So, what exactly is pH? In simple terms, it's a measure of the acidity or alkalinity of your soil, calculated on a scale from 0 to 14.
| pH Value | Description | Implication for Your Lawn |
| 0 to 6.9 | Acidic Soil | Essential nutrients like Nitrogen and Phosphorus become "locked up." The grass struggles to access them, often leading to moss and yellowing. |
| 7.0 | Neutral pH | The perfect balance! Nutrients are readily available to the grass roots. |
| 7.1 to 14 | Alkaline Soil | Micronutrients like Iron and Manganese become difficult for the grass to absorb. This can lead to a condition called chlorosis (yellowing between the veins). |
The Goldilocks Zone for Lawn Grass
For most common UK lawn grasses (ryegrass and fescues), the ideal range is slightly acidic to neutral—between pH 6.0 and 7.0. When your soil is within this range, the roots can easily absorb all the major and minor nutrients needed for lush, green growth.
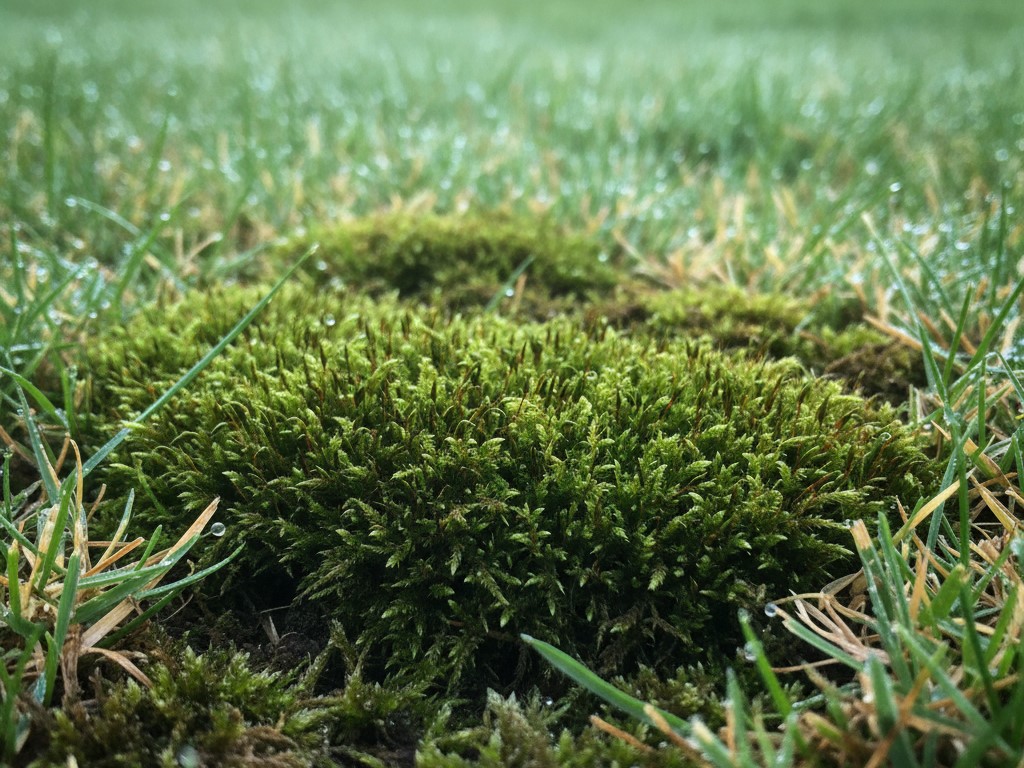
If your lawn constantly struggles with moss, or if fertiliser never seems to have the desired effect, chances are your pH is too low (too acidic). This is very common in high-rainfall areas of the UK.
Exactly How to Test Soil pH Yourself (The Actionable Steps)
You don’t need to send expensive samples off to a laboratory (though that is an option for maximum detail). You can perform a simple, accurate soil test for lawn purposes right in your own garden using an affordable soil testing kit.
This process is straightforward and should be done at least once a year, preferably in the autumn or spring, before major feeding or liming.
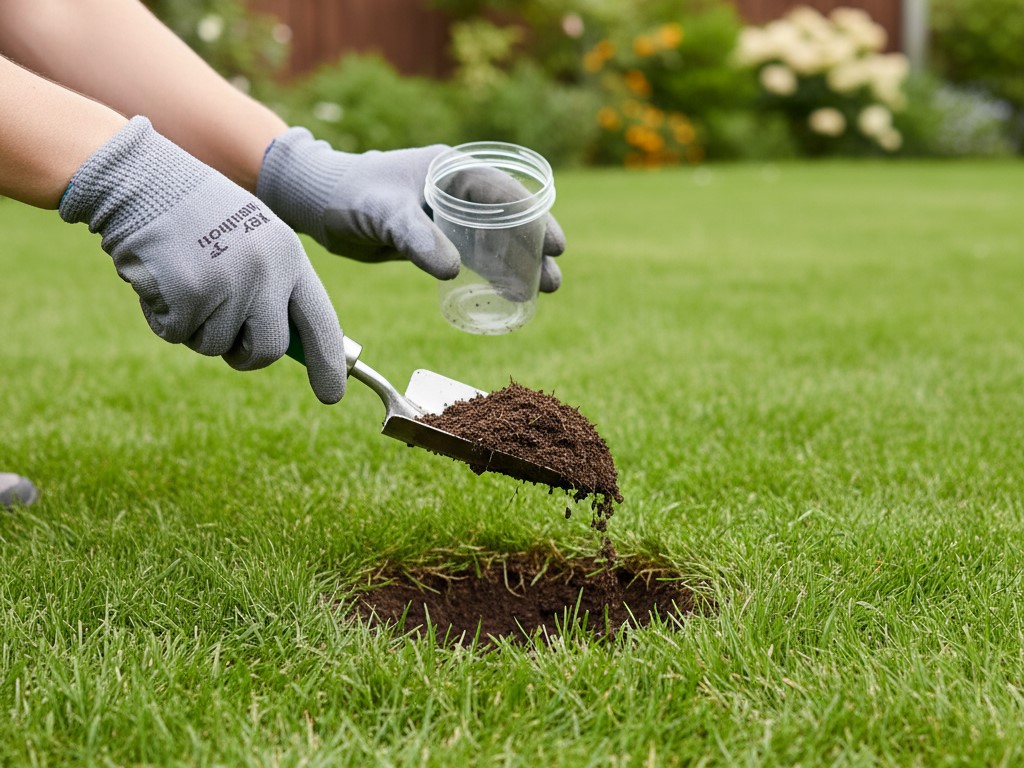
Step 1: Gathering Your Sample
Accuracy is key here. A single sample from one spot might not tell the whole story, as pH can vary across your lawn.
- Take Multiple Samples: Collect 5 to 10 small samples from various spots across your main lawn area.
- Dig Deep: The grass roots feed further down than the surface. Use a trowel to dig a small plug of soil down to about 10 to 15 cm (4 to 6 inches).
- Prepare the Sample: Remove any grass, stones, or roots from your samples. Mix all the sub-samples together in a clean bucket. This mixed sample gives you a good average reading for your whole lawn.
- Let it Dry: It’s best to let the mixed sample air-dry for a day or so, as wet soil can dilute the test chemicals.
Step 2: Running the Test (Using a Simple Kit)
Most common DIY soil testing kits use a simple colour-matching system.
- Fill the Capsule: Take a small amount of your dried, mixed sample and place it into the test capsule provided in the kit.
- Add the Chemical: Add the correct amount of the provided test chemical (usually a powder or a tablet) and distilled water to the capsule. Distilled water is important here, as tap water can sometimes affect the pH reading itself.
- Shake and Wait: Cap the capsule and shake it thoroughly to mix the soil and chemical. Leave it to settle for the recommended time (usually 10 minutes to an hour).
- Read the Result: Once the soil has settled at the bottom, the water above it will have changed colour. Compare this colour to the chart provided with your kit to find the pH number.
Now you know exactly how to test soil ph and have a number in hand. What do you do with it?
Reading the Results: Understanding Your Soil’s Condition
Your result will tell you immediately whether you have acidic soil, alkaline soil, or a nice neutral pH.
Scenario A: The Soil Is Too Acidic (pH below 6.0)
This is the most common issue in the UK. The low pH is "locking up" the nutrients.
- Symptoms: Moss growth thrives in acidic conditions, and your grass may look pale, even after fertilising.
- The Fix: You need to raise the pH level by adding an alkaline material. This is where lime for lawn application comes into play.
Scenario B: The Soil Is Too Alkaline (pH above 7.5)
Less common, but often found in areas with limestone bedrock or where hard water is used frequently for irrigation.
- Symptoms: Grass often shows yellowing between the veins (chlorosis) due to the iron and manganese being unavailable.
- The Fix: You need to lower the pH level by adding an acidic material, such as granular sulphur or specific iron sulphate products.
Scenario C: The Soil Is Perfect (pH 6.0–7.0)
Congratulations! You’re in the Goldilocks Zone.
- The Fix: Nothing! Focus your efforts and resources on other lawn care essentials like aeration, scarification, and regular feeding. Just remember how to test soil ph again next year to ensure it stays this way.
Going Professional with a Soil Test
While the home soil testing kit gives you a good, fast reading on your pH, for the ultimate detail, nothing beats sending a sample off to a professional lab.
- The Difference: Professional soil tests not only give you a highly accurate pH reading, but they also provide a full breakdown of the macro-nutrients (Nitrogen, Phosphorus, Potassium) and micro-nutrients in your soil.
- Cost-Effective Data: This service is often surprisingly inexpensive, frequently costing less than a bag of high-quality fertiliser. Search for local agricultural colleges or specialised soil analysis companies in the UK.
- The Payoff: The lab report will not only tell you what is missing but will also give you precise, tailor-made recommendations on the exact amount of lime to apply or fertiliser grade you need. This eliminates the guesswork, saving you money in the long run by ensuring you only apply what's needed.
Amending the Foundation: The Right Lawn Soil Amendments
Once your soil test for lawn has given you a clear target, it's time to act. Always remember to apply amendments when the soil is slightly damp and ideally when the weather isn't too windy.

To Raise the pH (Fixing Acidic Soil): Use Lime
Applying lime for lawn is the time-honoured method for correcting low pH.
- What to Buy:
- Agricultural Lime (Pulverised Limestone): This is the traditional, bulk option. It is slower-acting but very effective.
- Dolomitic Lime: Contains magnesium, which can be an added bonus if your soil is also magnesium-deficient.
- Granular/Pelletised Lime: More expensive but much easier to spread accurately with a standard fertiliser spreader and less messy. This is highly recommended for DIYers.
- How Much to Apply: This is critical. NEVER guess the amount! The required dosage depends entirely on your current pH and your soil type (sand, loam, or clay). You'll need to use a calculator (often provided by the lime supplier or online) that takes your current reading and soil type to determine the exact amount of lime for lawn application per square metre. Over-liming can make your soil too alkaline, which is just as damaging!
- Application Timing: Apply lime in the autumn or early spring. Allow several weeks (ideally 6-8) for it to fully react with the soil before applying fertiliser, as the two can counteract each other if mixed.
To Lower the pH (Fixing Alkaline Soil): Use Sulphur
For alkaline soil, you need to introduce acidity.
- What to Buy: Elemental Sulphur (granular or pelletised). This is the safest and most effective option for long-term pH reduction.
- How Much to Apply: Like lime, the dosage is specific to your current pH and soil type. Be extremely careful and follow the supplier’s recommended application rates, as over-applying sulphur can temporarily burn the grass.
- Application Timing: Apply in spring or autumn. Sulphur takes a long time to react fully—often a full season. You should re-test soil for lawn pH after about 6 months before considering a second application.
Advanced Strategies for Maintaining the Balance
Achieving the perfect pH isn't a one-time job; it’s about regular care and monitoring. Here are a few final expert tips to keep your foundation strong.
- Fertiliser Selection: If you have slightly acidic soil, look for fertilisers that are labelled as "pH-neutral" or even slightly alkaline. If your soil is alkaline, favour fertilisers that contain ammonium sulphate, as these can help gently acidify the root zone over time.
- The Power of Aeration: Core aeration (removing small plugs of soil) allows your lawn soil amendments—whether it's lime or sulphur—to penetrate deeper and faster into the root zone where they need to work their magic.
- Don't Rush It: pH adjustment is a slow process. Give your amendments time to work their way through the soil profile. Don't re-test for at least 3 to 6 months after application. The desire to see quick results often leads to over-amending, which swings the pH too far in the other direction. Patience is key!
In summary, ignoring your soil’s pH is like trying to train for a marathon on a diet of crisps—you might look okay on the outside, but you won't perform when it matters. Knowing how to test soil ph is one of the most empowering skills you can master as a DIY lawn enthusiast. Armed with a simple soil testing kit, you can identify the problem and use the correct lawn soil amendments to ensure your grass gets the perfect balanced diet it needs to flourish.
0 Comments