

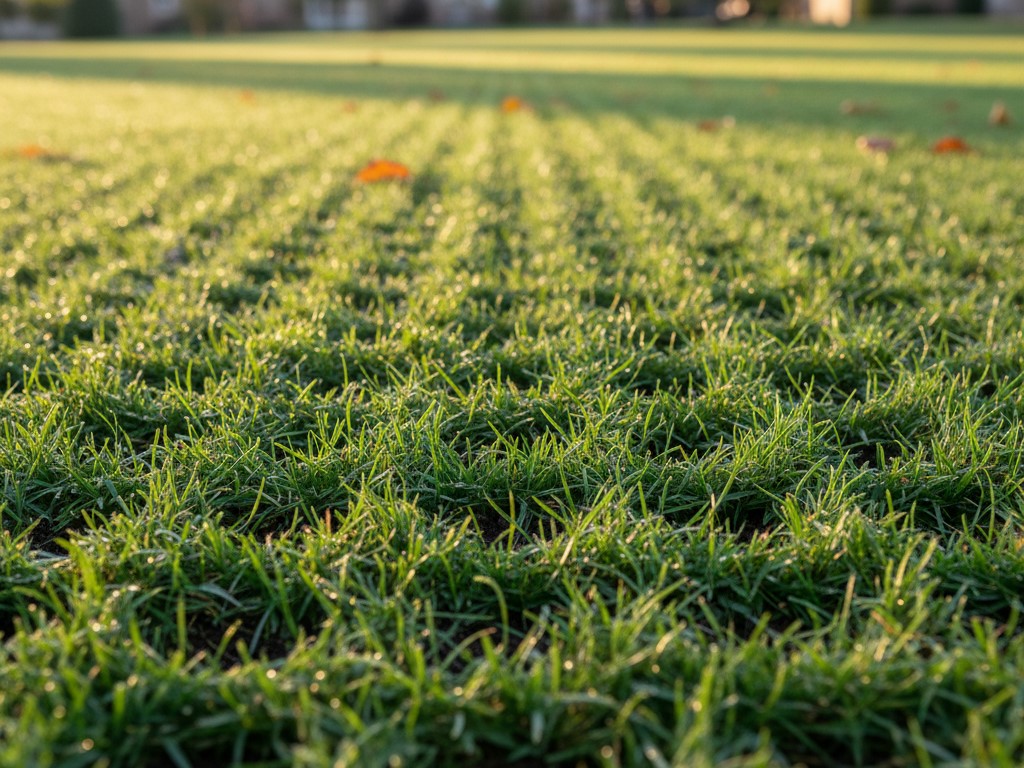
The changing leaves and crisp air bring a fantastic feeling of cosiness, but for your lawn, autumn is anything but a time to relax. In fact, it's arguably the most important season for setting your turf up for success. Skimp on care now, and you could be facing a thin, patchy, and disease-ridden mess come spring. That’s why we’ve put together this complete, step-by-step autumn lawn care guide, your secret weapon for achieving a robust, winter ready lawn.
Think of autumn as your garden’s marathon training season. You wouldn’t run a marathon without putting in the work, and your lawn is no different. We’re going to spend the next few months strengthening its roots, building up its reserves, and ensuring it has the protective layer it needs to shrug off the worst of the British winter. And the best part? It’s completely achievable for any homeowner or keen DIYer. You don't need a professional to get this right; you just need the right plan.
This guide will walk you through the essential steps, from feeding to scarifying and preparing for that final cut of the season. Grab a cuppa, get comfortable, and let's turn your turf into a cold-weather champion!
Phase 1: The Essential Prep Work
Before you start spreading fertiliser or scattering seeds, you need to set the stage. Autumn lawn care begins with improving the soil's environment, ensuring the grass roots can breathe, drink, and access the nutrients you'll be giving them.
Clearing the Debris: The Leaf Patrol
It might seem obvious, but a build-up of fallen leaves is one of the most common mistakes new homeowners make. A thick layer of leaves isn't just unsightly; it’s a smothering blanket that actively works against your grass.
Why Leaf Clearance is Crucial
- Blocks Sunlight: Grass needs every bit of light it can get, even in the dimmer autumn months, to photosynthesise and store energy.
- Traps Moisture: Leaves hold water against the grass blades and soil surface, creating a perfect breeding ground for fungal lawn diseases like snow mould and red thread.
- Compacts Grass: When wet, leaves can press down on the grass, weakening the plant and encouraging rot.
Your immediate, actionable step here is to clear all leaves regularly.
- The Rake: A good leaf rake is a classic for a reason. Make it a weekend chore and tackle the bulk of it.
- The Mower/Vacuum: Many modern rotary mowers have a collection box and can mulch or vacuum up leaves, which is often faster and doubles as a very light trim for your grass. Just ensure the leaves aren't too wet or thick.
- The Reward: You get fantastic material for your compost heap! Leaf mould is a brilliant soil conditioner.
Dealing with Compaction: The Aeration Advantage
Over the summer, your lawn has been walked on, played on, and perhaps even baked a bit by the sun. All this activity leads to soil compaction, which is where the soil particles are pressed too closely together.
Why Aeration Can't Wait
Compacted soil is your lawn’s worst enemy because it:
- Restricts Root Growth: Roots can't easily push through dense soil to find water and nutrients.
- Hinders Drainage: Water pools on the surface instead of soaking in, again promoting disease.
- Prevents Air Exchange: The roots literally suffocate without access to oxygen and struggle to release carbon dioxide.
Aeration creates small holes in the turf, opening up the soil structure and allowing everything—water, air, and nutrients—to penetrate down to the roots. It’s a vital step in creating a truly winter ready lawn.
- Spiking (Tine Aeration): This is the most common method. You use a garden fork, or better yet, a dedicated hollow tine aerator to punch holes into the soil.
- Tine Type: We recommend hollow tines for autumn, as they remove small plugs of soil. This offers the best, most long-term relief from compaction.
- Depth: Aim for holes about 5-10 cm deep, spaced every 10-15 cm across the entire lawn surface.
Once the holes are made, leave the soil plugs (the 'cores') on the lawn to dry out before brushing or raking them up. This is a messy job, but the results are worth the effort.
Phase 2: Feeding and Filling
With your soil aerated and breathing again, the next step is providing the essential nutrients for cold weather survival and tackling any bald patches left over from the summer.
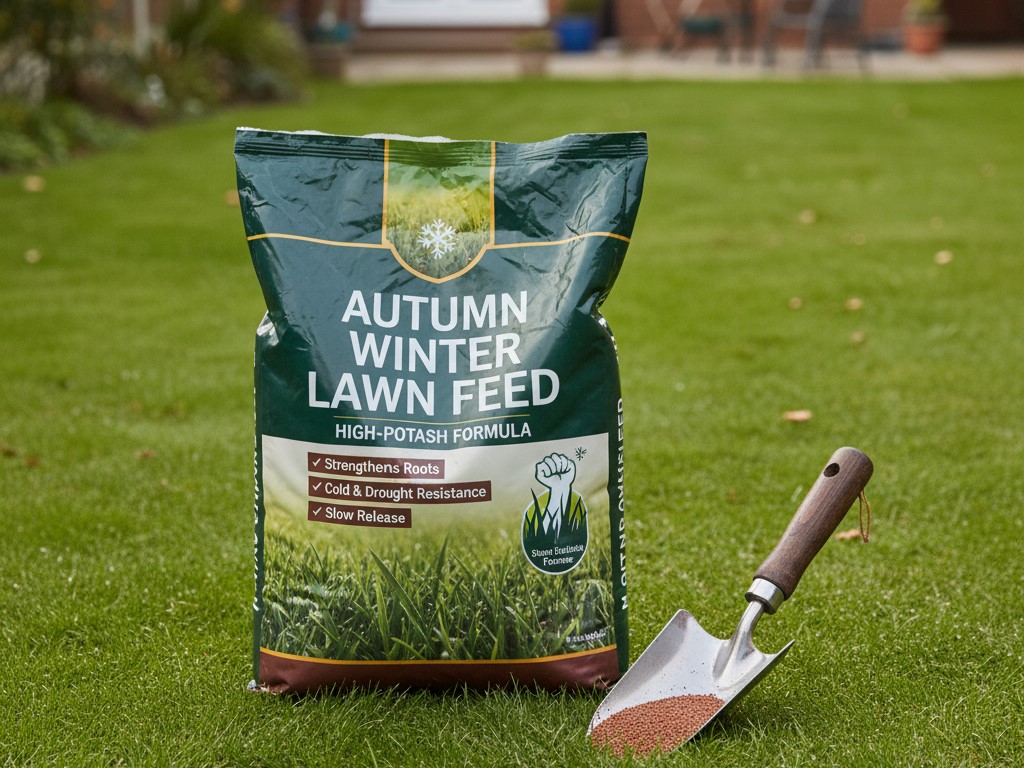
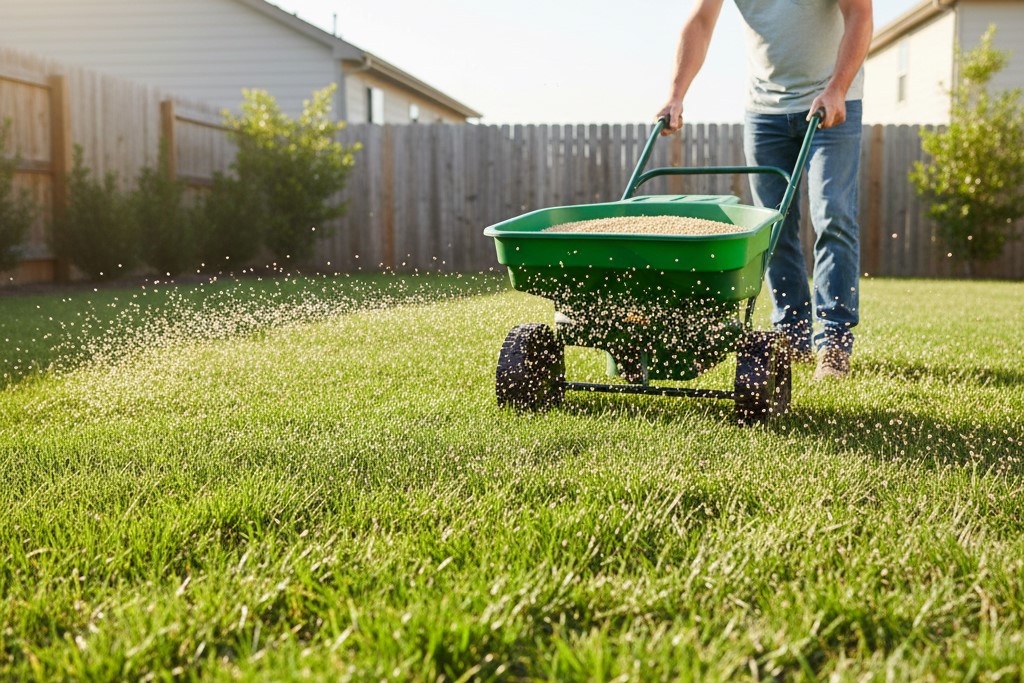
The Autumn Feed: Why Fertilizer Changes
Forget about the high-nitrogen summer feeds you were using; they encourage leafy, green growth, which would be vulnerable to the coming frost. For a successful autumn lawn care guide, we shift the focus entirely.
The Big Two: Potassium and Phosphate
- Potassium (K): This is the star of the autumn feed. Potassium is like your lawn's internal anti-freeze. It strengthens the cell walls of the grass blades, improving their tolerance to cold, drought, and disease. It is absolutely essential for a strong winter ready lawn.
- Phosphate (P): Crucial for root development. Applying phosphate now helps the grass build a deep, extensive root network that will stabilise the plant and allow it to draw on reserves through the winter.
Look specifically for an Autumn/Winter Lawn Feed product. These are specially formulated to have a high potash (potassium) and phosphate content and a much lower nitrogen level. Apply this feed following the manufacturer’s instructions, ideally on a day when rain is forecast or immediately followed by watering it in.
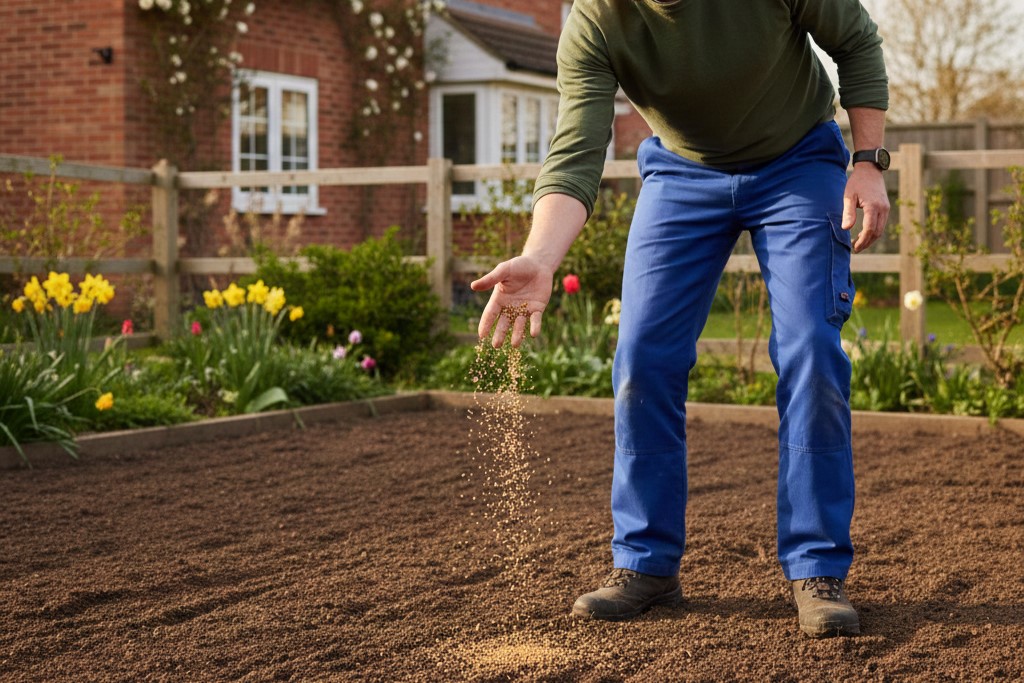
Patching Up: Overseeding in Autumn
If your lawn has bare spots, thin patches, or suffered from summer scorch or heavy traffic, autumn is the absolute best time to repair it. The soil is still warm from the summer, but the air temperatures are cooling and rain is more frequent—the perfect combination for rapid seed germination. This step, which often involves overseeding in autumn, is key to increasing turf density.
The Overseeding Process
- Prepare the Surface: Lightly rake or scratch the bare patches to loosen the soil surface. This creates a good 'seedbed' for the new grass to settle into.
- Choose Your Seed: Use a good quality seed mix that matches your existing lawn, often a Fescue and Rye mix for hard-wearing British lawns.
- Scatter: Scatter the seed evenly over the patch. Use a thin layer; you should be able to see the soil between the seeds. Don't dump a huge pile on—that just wastes seed and encourages clumping.
- Top Dressing: The 'secret weapon' of overseeding! Apply a thin layer (about 0.5 cm) of fine top dressing (a sand/soil/compost mix) over the seeds. This protects them from birds, helps retain moisture, and ensures great seed-to-soil contact.
- Watering: Keep the newly seeded areas consistently moist (but not waterlogged) for the next 2-3 weeks until the seedlings are established.
Note: Do not apply a weedkiller or weed-and-feed product when you are overseeding, as the chemicals will also kill your new grass seedlings. Wait until the new grass has been mown at least 3-4 times.
Phase 3: The Final Touches
The final phase of your autumn lawn care guide involves managing moisture, dealing with surface issues, and preparing for the long winter slumber.

Sanding and Top Dressing
Following aeration, top dressing is an incredibly beneficial practice. The material fills the holes you created, which is vital for long-term health. A good top dressing is typically a mix of sharp sand, soil, and organic matter.
Benefits of Top Dressing
- Improves Drainage: The sand component helps water filter quickly into the soil, preventing waterlogging, particularly important as the winter rain begins.
- Levels Surface: It slowly fills in minor dips and imperfections, creating a smoother lawn surface.
- Amends Soil: The organic component boosts the soil structure and provides a slow-release natural food source.
If you have a very heavy, clay-based soil, focus your top dressing heavily on the sand component to permanently open up the soil structure. Spread the dressing over the lawn and then brush it into the aeration holes.
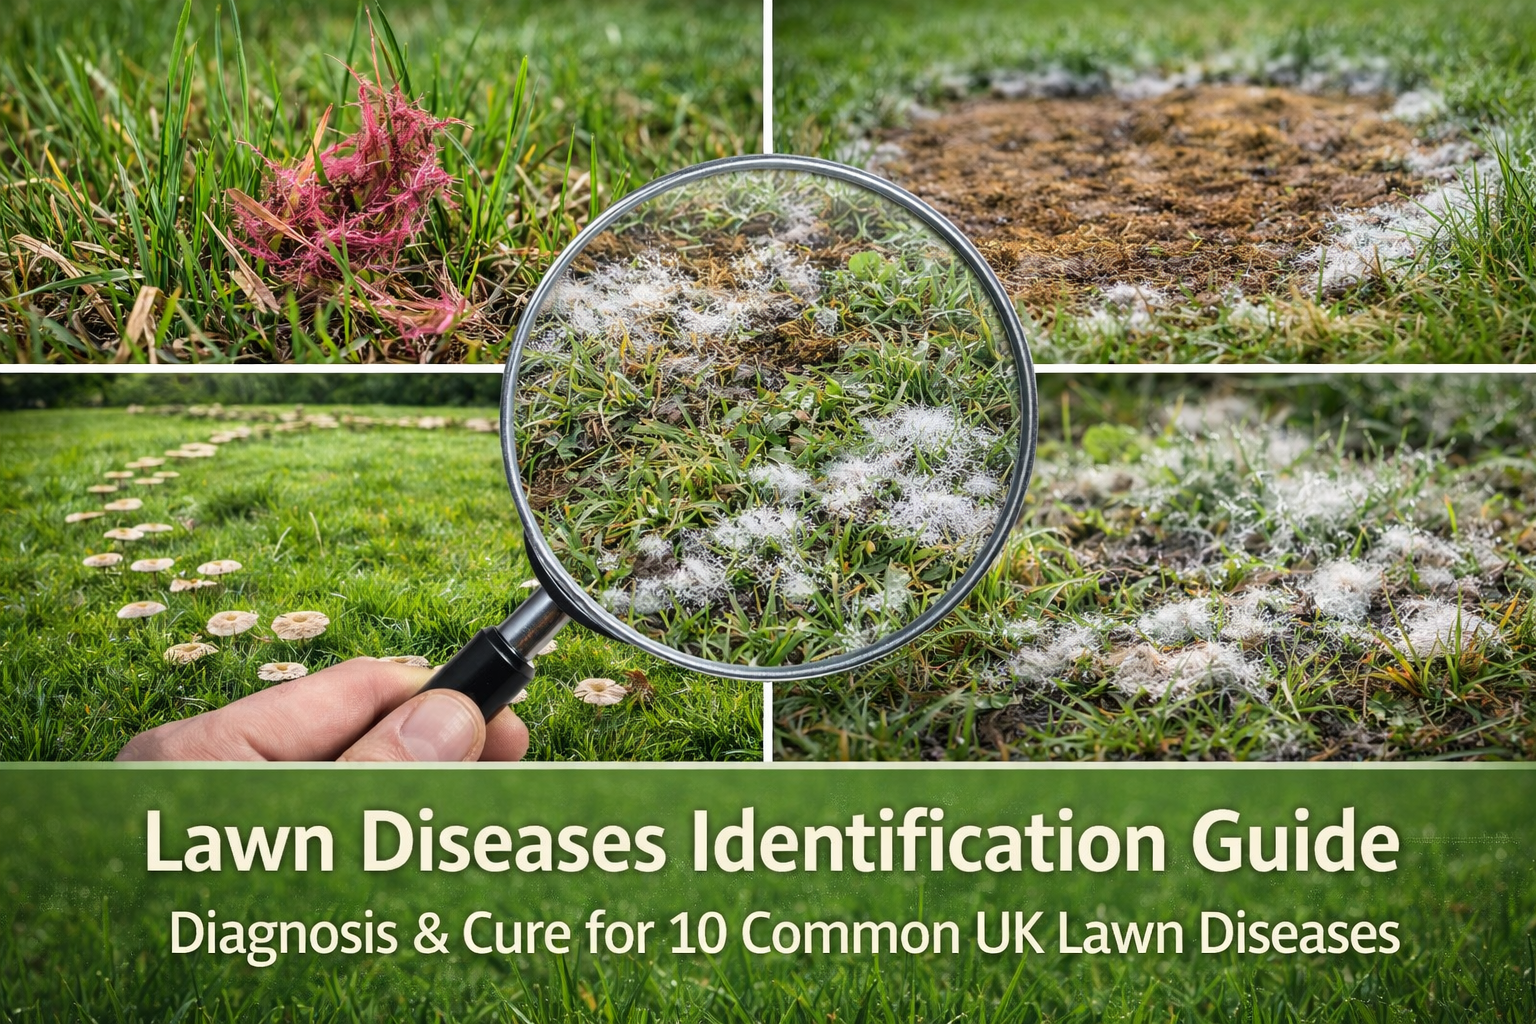
Moss and Weed Control
Moss loves the moist, low-light conditions of autumn and winter, and it spreads rapidly. Weeds, while slowing down, can still thrive and compete with your grass. Tackling these now prevents them from taking hold over winter.
- Moss Treatment: Use a ferrous sulphate (iron sulphate) based moss killer. This will turn the moss black within a couple of weeks.
- Weed Control: Apply a selective lawn weedkiller now if you have a significant problem. Always check the label to ensure it's safe for use in cooler autumn temperatures.
- The Rake/Scarifier: Once the moss is dead (black), it must be removed. Use a scarifier or a very aggressive garden rake to scarify the lawn and physically pull out the dead moss and thatch. This will look brutal, but your lawn will thank you for it in the spring.
The best time to scarify is just before or immediately after you overseed, as this exposes the soil for the new seeds to settle into.
Phase 4: Getting the Mower Ready for Hibernation
The final, essential component of your autumn lawn care guide is adjusting your mowing routine and making that crucial final cut of the season.

Mowing Adjustments: Go Higher and Slower
As the temperature drops and grass growth slows, your mowing frequency should decrease. More importantly, the cutting height must increase.
- Height is Key: Raise your cutting deck to its highest or second-highest setting. Cutting the grass too short in autumn weakens the plant, making it far more susceptible to disease and frost damage.
- The Principle: Taller blades of grass mean a greater surface area for photosynthesis, allowing the grass to store maximum energy for the winter. The extra blade length also offers a better insulating layer for the crowns (the base of the grass plant).
Keep mowing as long as the grass is actively growing. If you notice it’s barely grown since the last cut, you can hold off.
The Final Cut of the Season
The true final cut of the season is usually done just before the first heavy frost or when grass growth has virtually stopped (often late November or early December, depending on your location in the UK).
- The Rules: Again, keep the height high. You are just tidying up and ensuring the grass isn't too long that it flops over and creates a moist, disease-prone mat.
- Preparation: Ensure your mower blades are sharp. A blunt blade rips the grass, leaving a jagged edge that is vulnerable to fungal infection—the last thing you want before winter.
- Clean Up: Always collect the clippings on this final cut. Leaving a layer of clippings to decompose is a recipe for thatch and moss issues over the winter.
After this cut, give your mower a thorough clean, sharpen the blades (or get them sharpened), and store it away. Its long winter rest has begun!
Putting it All Together: The Autumn Timeline Checklist
Successfully preparing a winter ready lawn requires a systematic approach. Here is a simplified timeline of when to tackle each task, though remember that all timings are weather-dependent.
| Task | Timing (Roughly) | Priority |
| Clear Leaves | Weekly, from the first drop to the last | Essential |
| Aerate (Hollow Tining) | Early to Mid-Autumn (September/Early October) | High |
| Scarify | Early to Mid-Autumn (September/Early October) | High |
| Overseeding in Autumn | Immediately after Aerating/Scarifying (Mid-September to Mid-October) | High |
| Apply Top Dressing | Immediately after Overseeding | Medium |
| Apply Autumn/Winter Feed | Mid-Autumn (Mid-October) | Essential |
| Apply Moss/Weed Killer | As needed, following temperature guidelines | Medium |
| Raise Mowing Height | Starts Late Summer/Early Autumn | High |
| Final Cut of the Season | Late Autumn (Late November/Early December) | Essential |
Your Winter Ready Lawn
If you follow this comprehensive autumn lawn care guide, you are doing everything humanly possible to protect your lawn. The work you put in now isn't just maintenance; it's a massive investment. You are giving your grass the reserves, the strength, and the healthy environment it needs to survive the harshest season.
When the cold weather hits, you’ll be able to look out at your turf with confidence, knowing that under the surface, a strong, deep root system is waiting patiently for the first warmth of spring. You won't just have a lawn; you’ll have a champion, and you did it all yourself.
0 Comments